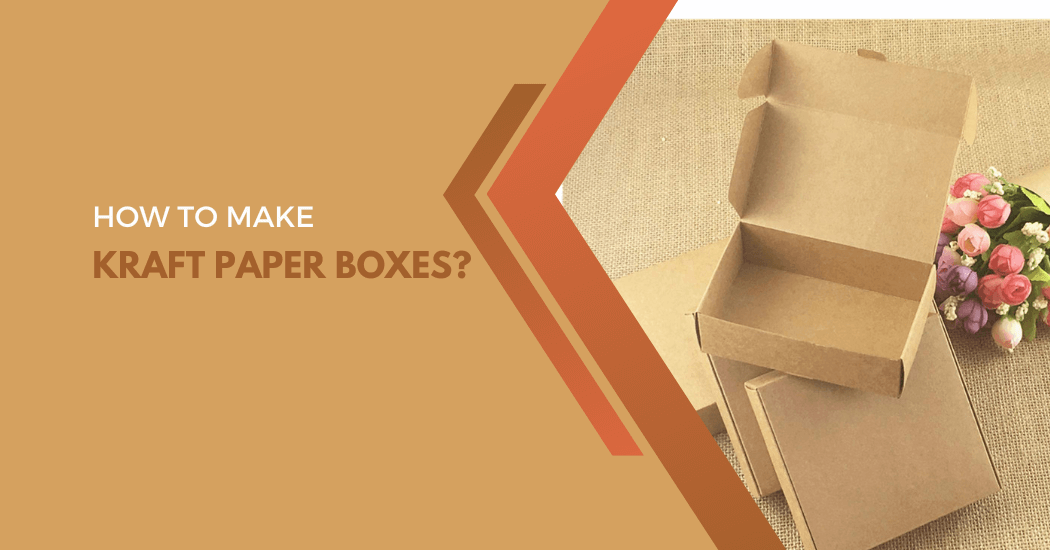
How to make kraft paper boxes?
Kraft paper boxes are versatile, eco-friendly and highly customizable, making them a popular choice for both personal and commercial use. They provide an excellent solution for packaging gifts, homemade crafts and even food items.
In this guide, we will walk you through the simple and satisfying process of making your own kraft paper boxes.
Whether you’re a DIY enthusiast wanting to add a personal touch to your gifts or a small business owner looking for an economical and sustainable packaging solution, mastering the art of making kraft paper boxes can be a valuable skill.
Kraft Boxes Making Process
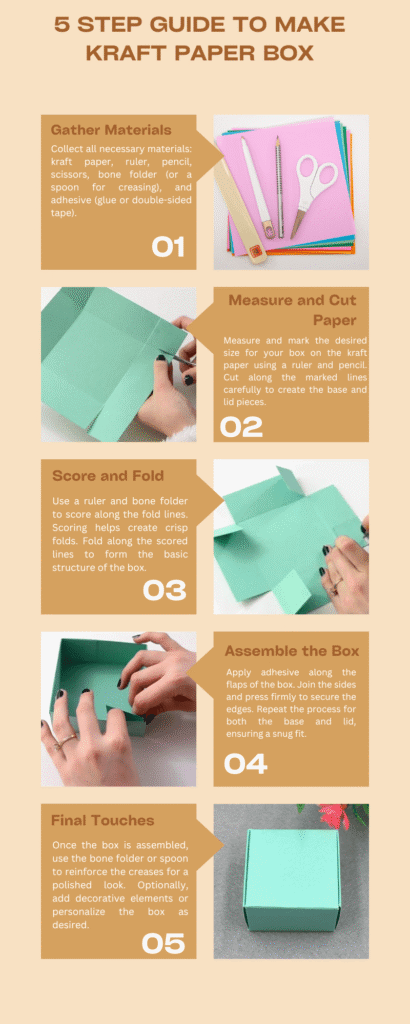
Materials needed for making kraft paper boxes
- Kraft Paper: This is the primary material needed. The thickness of the paper should be chosen based on what you intend to put in the box. Heavy items will require thicker paper.
- Ruler: A ruler will help you measure and draw straight lines, ensuring that your box has even sides.
- Scissors: You’ll need scissors to cut the paper. Make sure they are sharp for clean, precise cuts.
- Pencil: A pencil is used to trace out the pattern of the box on the kraft paper before cutting it.
- Glue: You’ll need glue to join the different parts of the box together. A glue stick works well for this purpose.
- Bone folder/credit card: This tool will help you make crisp and clean folds. If a bone folder is not available, the edge of a credit card can work as a substitute.
Steps of Making Basic Kraft Paper Box
- Sketch the box layout: Using your pencil and ruler, draw a simple square or rectangle on your kraft paper. This will be the base of your box. The sides of the box will extend from this base, so sketch four equal lines extending outward from each side of your base shape.
- Cut out your box: Use your scissors to cut out the shape you have drawn. You should have a cross-like shape with a square or rectangle in the center. Each of the four sides should have four flaps.
- Fold the box: Fold the paper along the lines of your square or rectangle (the base of your box). Use your bone folder or the edge of a credit card to make these folds clean and crisp.
- Glue the box together: Apply glue to the flaps that extend from the sides of your box. Then, fold the sides upward, sticking the flaps to the inside of the neighboring sides. Hold each side for a few seconds to let the glue dry.
- Finishing: Once the glue is dry, you’ll have a completed kraft paper box! You can customize it further by adding stickers, tags or any other decorations of your choice.
And there you have it! With a little patience and creativity, making your own kraft paper boxes can be a fun and rewarding process. Now you can package your items in an environmentally-friendly and personalized way!
Tips for making kraft paper boxes
- Use quality materials: To ensure durability and a beautiful finish, always choose high-quality kraft paper and glue. Lower-quality materials may result in a box that is not sturdy and does not hold up well.
- Be precise: Precision is key when cutting and folding your box. Even small inaccuracies can result in a final product that is uneven or does not fit together properly.
- Practice makes perfect: Don’t be discouraged if your first few boxes aren’t perfect. Practice will help you improve your skills and create better boxes over time.
- Customization: Kraft paper boxes are a blank canvas for your creativity! Use colored pencils, markers or paint to add a personal touch. You can also consider using stamps or stickers for decoration.
- Consider the purpose: Keep in mind the purpose of the box. If it’s for a gift, you might want to decorate it more elaborately. If it’s for storage, a simple design might be more appropriate.
Troubleshooting common issues in making kraft paper boxes
While making kraft paper boxes is a relatively simple process, there are some common issues that you may encounter. Here are a few troubleshooting tips to help you resolve these issues and achieve the perfect box:
- Uneven sides: If your box ends up with uneven sides, check that your measurements are accurate and your cuts are straight. You can also try trimming the edges of the box to even them out.
- Box not closing properly: If your box doesn’t close properly, make sure that all the flaps are glued down securely. If necessary, you can add more glue or use tape to reinforce the seams.
- Glue smudges: To avoid getting visible glue marks on your finished box, be careful when applying and spreading the glue. You can also use a small paintbrush to apply the glue more precisely.
- Box collapsing: If your box is not holding up well, check that you are using thick enough paper and enough glue. You may also need to consider reinforcing the corners with extra glue or tape for added stability.
- Difficulty in folding: If you’re having trouble making crisp folds, try scoring the paper along the fold lines with a ruler and an unsharpened pencil. This will help create a guide for folding along the desired lines.
Always remember to take your time and be patient when making kraft paper boxes. With practice, you’ll become more skilled at troubleshooting any issues that may arise during the process. Now go forth and create beautiful custom kraft paper boxes!
Tips for adding visual interest to your kraft paper boxes
- Incorporate patterns: If a plain kraft paper box feels too simple, consider using kraft paper with patterns or adding patterns yourself with paint or markers. This can add a fun, personalized touch to your boxes.
- Utilize stamps: Stamps can create a range of decorative effects without needing a great deal of artistic skill. You can use alphabet stamps for personalization or decorative stamps to create a themed design.
- Add color: While kraft paper typically comes in a brown color, you can always add color by painting or using colored markers on the box. Consider using colors that match the theme of the gift or event.
- Use ribbons or twin: Wrap a decorative ribbon or twine around your box. This can add a charming, rustic look to your kraft paper box and is an easy way to make your box more festive.
- Attach tags or labels: Personalize your kraft paper box by attaching a tag or label. You can use a printed label or take the time to handwrite a personal message or the recipient’s name.
- Incorporate texture: Consider adding elements like lace, burlap or fabric for a textured look. This can contrast nicely with the simple, smooth surface of the kraft paper box.
Remember, the goal is to create a kraft paper box that not only serves its purpose but also delights the recipient with its visual appeal. So, unleash your creativity and have fun decorating!
FAQs
What type of glue is best for making kraft paper boxes?
Normal craft glue should be sufficient but make sure it dries clear to avoid visible marks on your finished boxes.
How can I prevent my box from collapsing?
Make sure you are using thick enough paper and enough glue. Reinforcing the corners with extra glue or tape for added stability can also help.
Can I make kraft paper boxes of any size?
Yes, you can make your box any size you want. Just remember to adjust your measurements accordingly.
How can I add a personal touch to my kraft paper box?
Kraft paper boxes can be customized in endless ways. You can add patterns, use stamps, attach tags or incorporate different textures.
I’m having trouble making crisp folds, what can I do?
Try scoring the paper along the fold lines using a ruler and an unsharpened pencil. This will create a guide to help you fold the paper more easily.
Can I use kraft paper boxes for storing items?
Yes, kraft paper boxes can be used for storage. However, remember to consider the weight and size of items to ensure the box is suitable.
Final words
With a bit of effort and the right materials, it is not hard to make kraft paper boxes. All instructions for this task are easy to follow and can be completed as a fun home activity or weekend project. It’s important to plan ahead, do the necessary calculations, double-check measurements and work on removing wrinkles from the box if any.
Taking all these steps will lead you to have a sturdy handmade box that you can use for your projects or gifts! If you’re hesitant, just remember that with careful guidance there is nothing that cannot be conquered.